Manufacturing by using
![]() Like at the first operation, finish by cutting the surplus part around the contour of the wing model (leaving the edge of the drawing visible right outside the perimeter of the Burner for gluing).
Like at the first operation, finish by cutting the surplus part around the contour of the wing model (leaving the edge of the drawing visible right outside the perimeter of the Burner for gluing).
A significant and very useful issue is that of keeping the wing codes that are printed on its lower part, inside the wing that we are to make by joining the two sheets with the legible written part to the inside. Thus is avoided the confusion related to which is the right side and which is the left side. Furthermore, the printed part remains so protected inside the wing and it shall last longer.
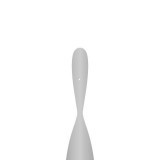
The finishing of the outer contour of the wings and wing pockets can be performed either directly by cutting along the outer contour of the wings, using the Burner and the scissors or by joining the two sheets (a printed one and the other neutral), cutting them on the outer contour by a cutting device by support on a solid surface. Position the Wings by observing the same size corresponding to the cut wing and glue it with a flame (firelighter/match), then swiftly passing it over the outer contour of the Burner in order to glue the edge of the wing. Immediately remove the modelled wing from the Burner and eventually give to it a shape more suitable to use in creating the artificial fly.
At the end of the above operations, we shall obtain perfectly realistic wings similar to such of real bugs and we shall proceed to making our fly.
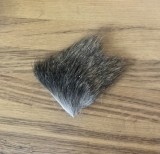
In order to make the wings used for floating bugs, we recommend that you should use two sheets, either the drawn part or the neutral one, keeping an air bubble inside the wing itself that shall increase the floating capacity of the artificial bug. In order to make sinking bugs, we recommend that you should use only the sheet with the drawn part.
0728446246
office@realisticflies.ro